
Middleware
미들웨어는 라우트 핸들러 이전에 요청되는 함수이다.
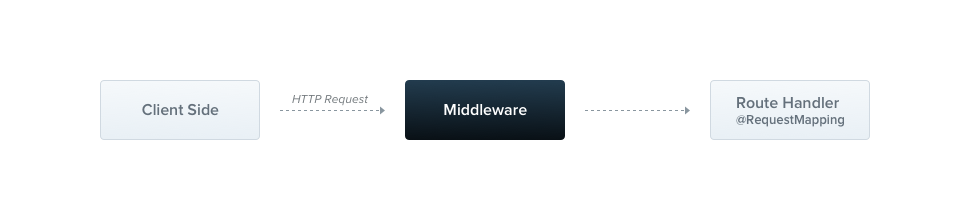
Nest의 미들웨어는 express의 미들웨어와 같다고 한다. 다음은 express 공식 문서에서 설명하는 미들웨어 함수의 기능들이다.
- 모든 코드를 실행한다.
- 요청 및 응답 객체를 변경한다.
- 요청-응답 주기를 종료한다.
- 스택에서 다음 미들웨어 함수를 호출한다.
- 현재 메들웨어 기능이 요청-응답 주기를 종료하지 않으면 next()를 호출해서 다음 미들웨어 함수로 넘겨야 한다. 그렇지 않으면 요청이 중단된다.
그리고 express같은 경우 미들웨어를 등록할 때 순서가 존재했었다.
Nest도 마찬가지라고 한다. 또한 아래의 코드를 보면 @Injectable() 데코레이터를 볼 수 있다. 이는 Nest 미들웨어 역시 의존성 주입을 지원한다는 것을 알 수 있다. 미들웨어 작성 시 클래스는 NestMiddleware 인터페이스를 implements해야 하고, 함수는 특별히 요구되는 것이 없다.
import { Injectable, NestMiddleware } from '@nestjs/common';
import { Request, Response, NextFunction } from 'express';

@Injectable()
export class LoggerMiddleware implements NestMiddleware {
  use(req: Request, res: Response, next: NextFunction) {
    console.log('Request...');
    next();
  }
}
미들웨어 생성 역시 CLI를 입력하면 된다. logger 미들웨어를 만든다고 하면 다음과 같이 터미널에 입력하면 된다.
nest g middleware logger
명령어를 입력하면 logger라는 디렉토리가 생성된다. 그리고 위의 코드대로 입력하는데, 여기서 request, response, next 매개변수는 express와 같기 때문에 express에서 타입을 받아온다.
이 미들웨어를 적용하려고 하는데 @Module() 데코레이터에는 미들웨어를 등록하는 장소가 없다. 대신 모듈 클래스의 configure() 메서드를 이용하면 된다.
import { MiddlewareConsumer, Module, NestModule } from '@nestjs/common';
import { AppController } from './app.controller';
import { AppService } from './app.service';
import { CatsModule } from './cats/cats.module';
import { LoggerMiddleware } from './logger/logger.middleware';

@Module({
  imports: [CatsModule],
  controllers: [AppController],
  providers: [AppService],
})
export class AppModule implements NestModule {
  configure(consumer: MiddlewareConsumer) {
    consumer.apply(LoggerMiddleware).forRoutes('cats');
  }
}
미들웨어를 포함하는 모듈은 NestModule 인터페이스를 구현해야 한다. 그래서 AppModule에 implemnets NestModule을 작성한다.
또한 MiddlewareConsumer라는 헬퍼 클래스를 사용해야 한다. apply()를 통해 logger 미들웨어를 등록했고, 뒤에 forRoutes('cats')를 통해 /cats 엔드포인트일 때 해당 미들웨어가 작동하도록 할 수 있다. 만약 모든 엔드포인트에 대해 이 미들웨어를 사용하고 싶다면 와일드카드를 사용하여 forRoutes('*')로 설정하면 된다. 혹은 Controller를 직접 입력해도 된다.
...
export class AppModule implements NestModule {
  configure(consumer: MiddlewareConsumer) {
    consumer.apply(LoggerMiddleware).forRoutes(CatsController);
  }
}
일단 테스트를 위해 임시로 cats 컨트롤러를 만들어보자.
import { Controller, Delete, Get, Patch, Post, Put } from '@nestjs/common';
import { CatsService } from './cats.service';

@Controller('cats')
export class CatsController {
  constructor(private readonly catsService: CatsService) {}

  @Get()
  getAllCat() {
    return 'all cat';
  }

  @Get(':id')
  getOneCat() {
    return 'one cat';
  }

  @Post()
  createCat() {
    return 'create cat';
  }

  @Put(':id')
  updateCat() {
    return 'update cat';
  }

  @Patch(':id')
  updatePartialCat() {
    return 'update cat';
  }

  @Delete(':id')
  deleteCat() {
    return 'delete cat';
  }
}
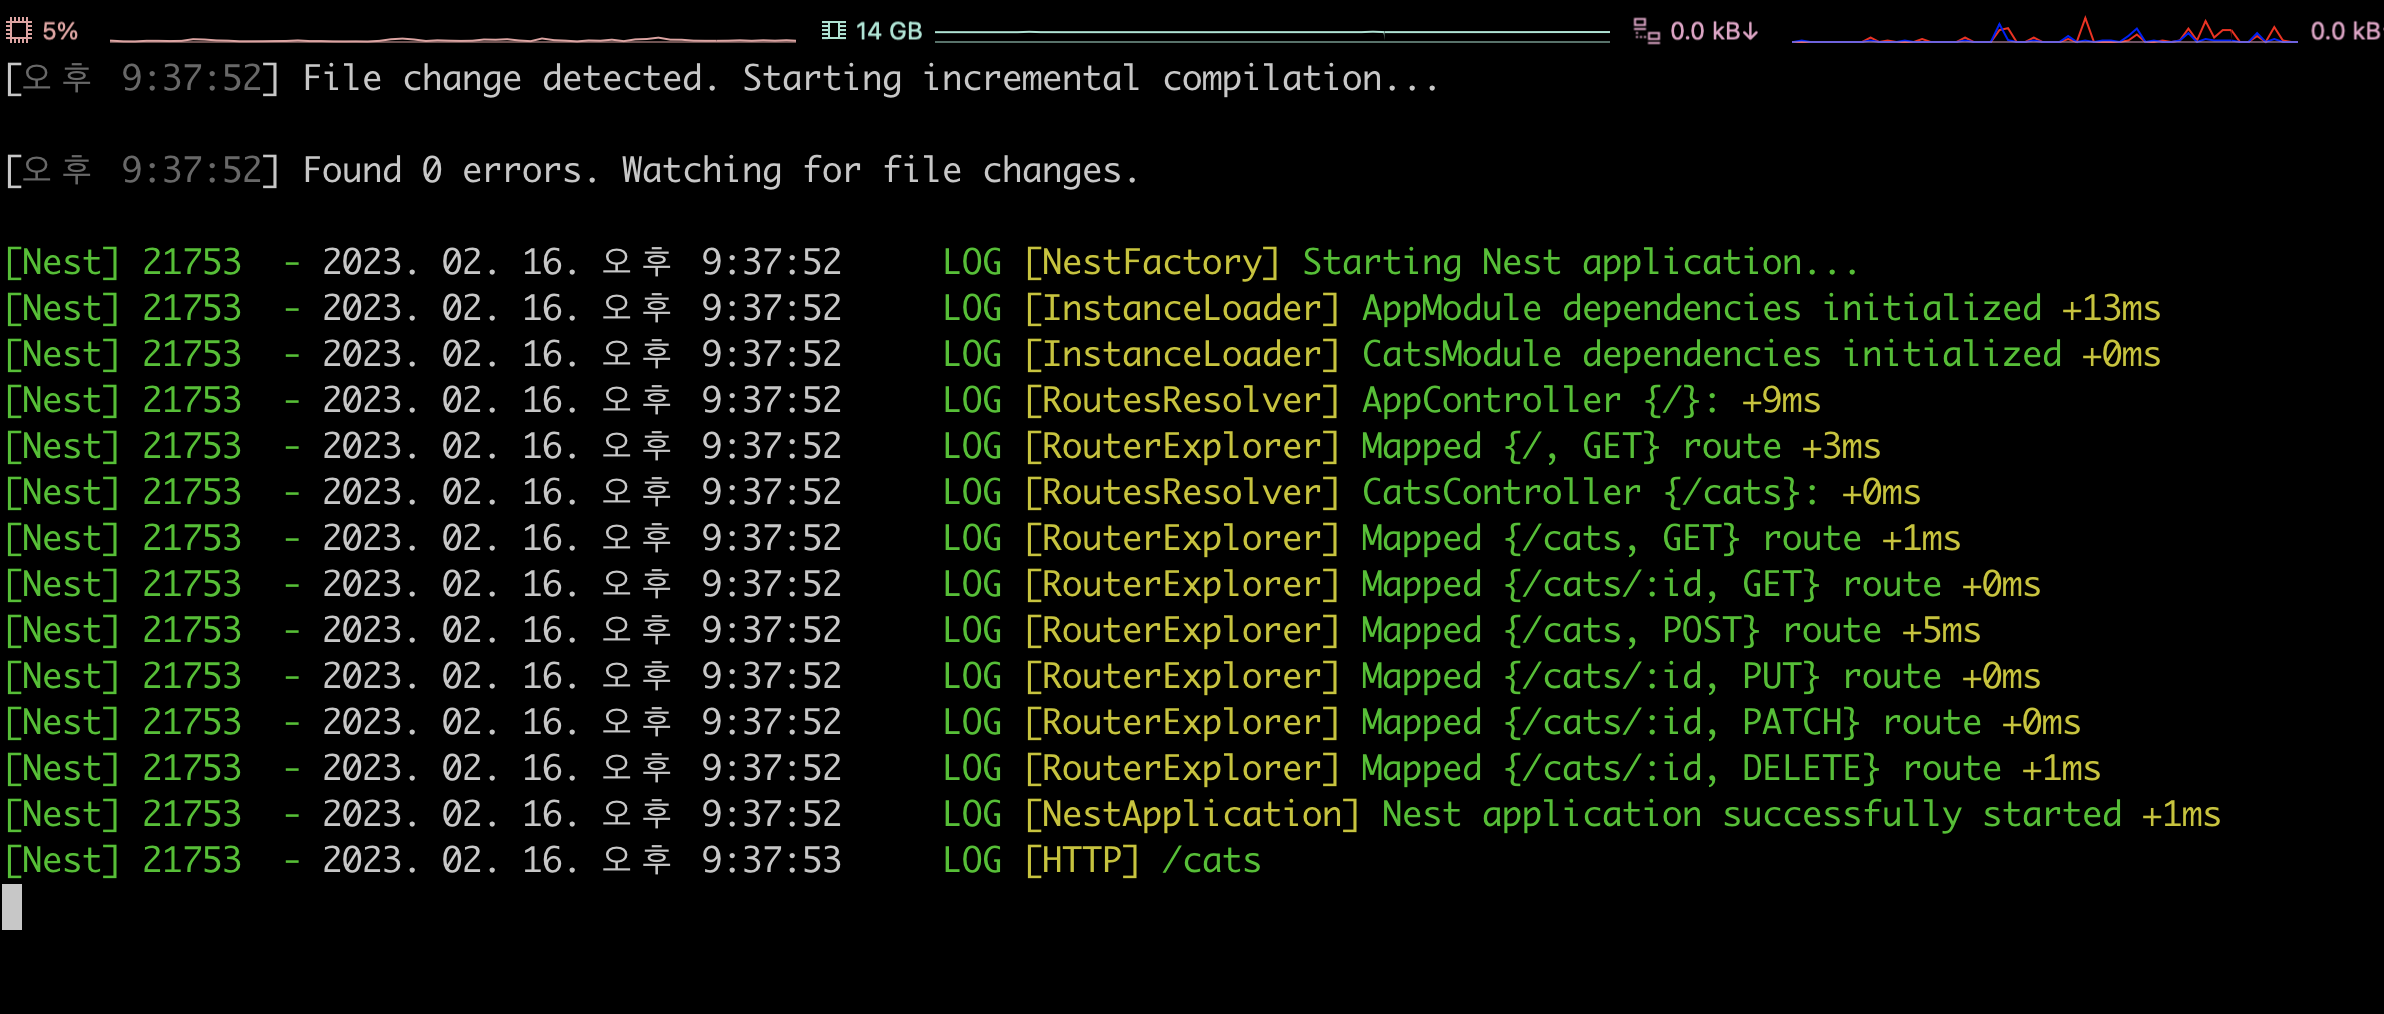
그리고 서버를 실행한 후, api 테스트 플랫폼을 통해서 테스트해보자. 참고로 나는 Thunder Client라는 vscode의 익스텐션을 사용한다. postman하고 같은거라고 보면 된다(컨텍스트 스위칭할 소요가 줄어들어서 이 익스텐션을 사용한다).
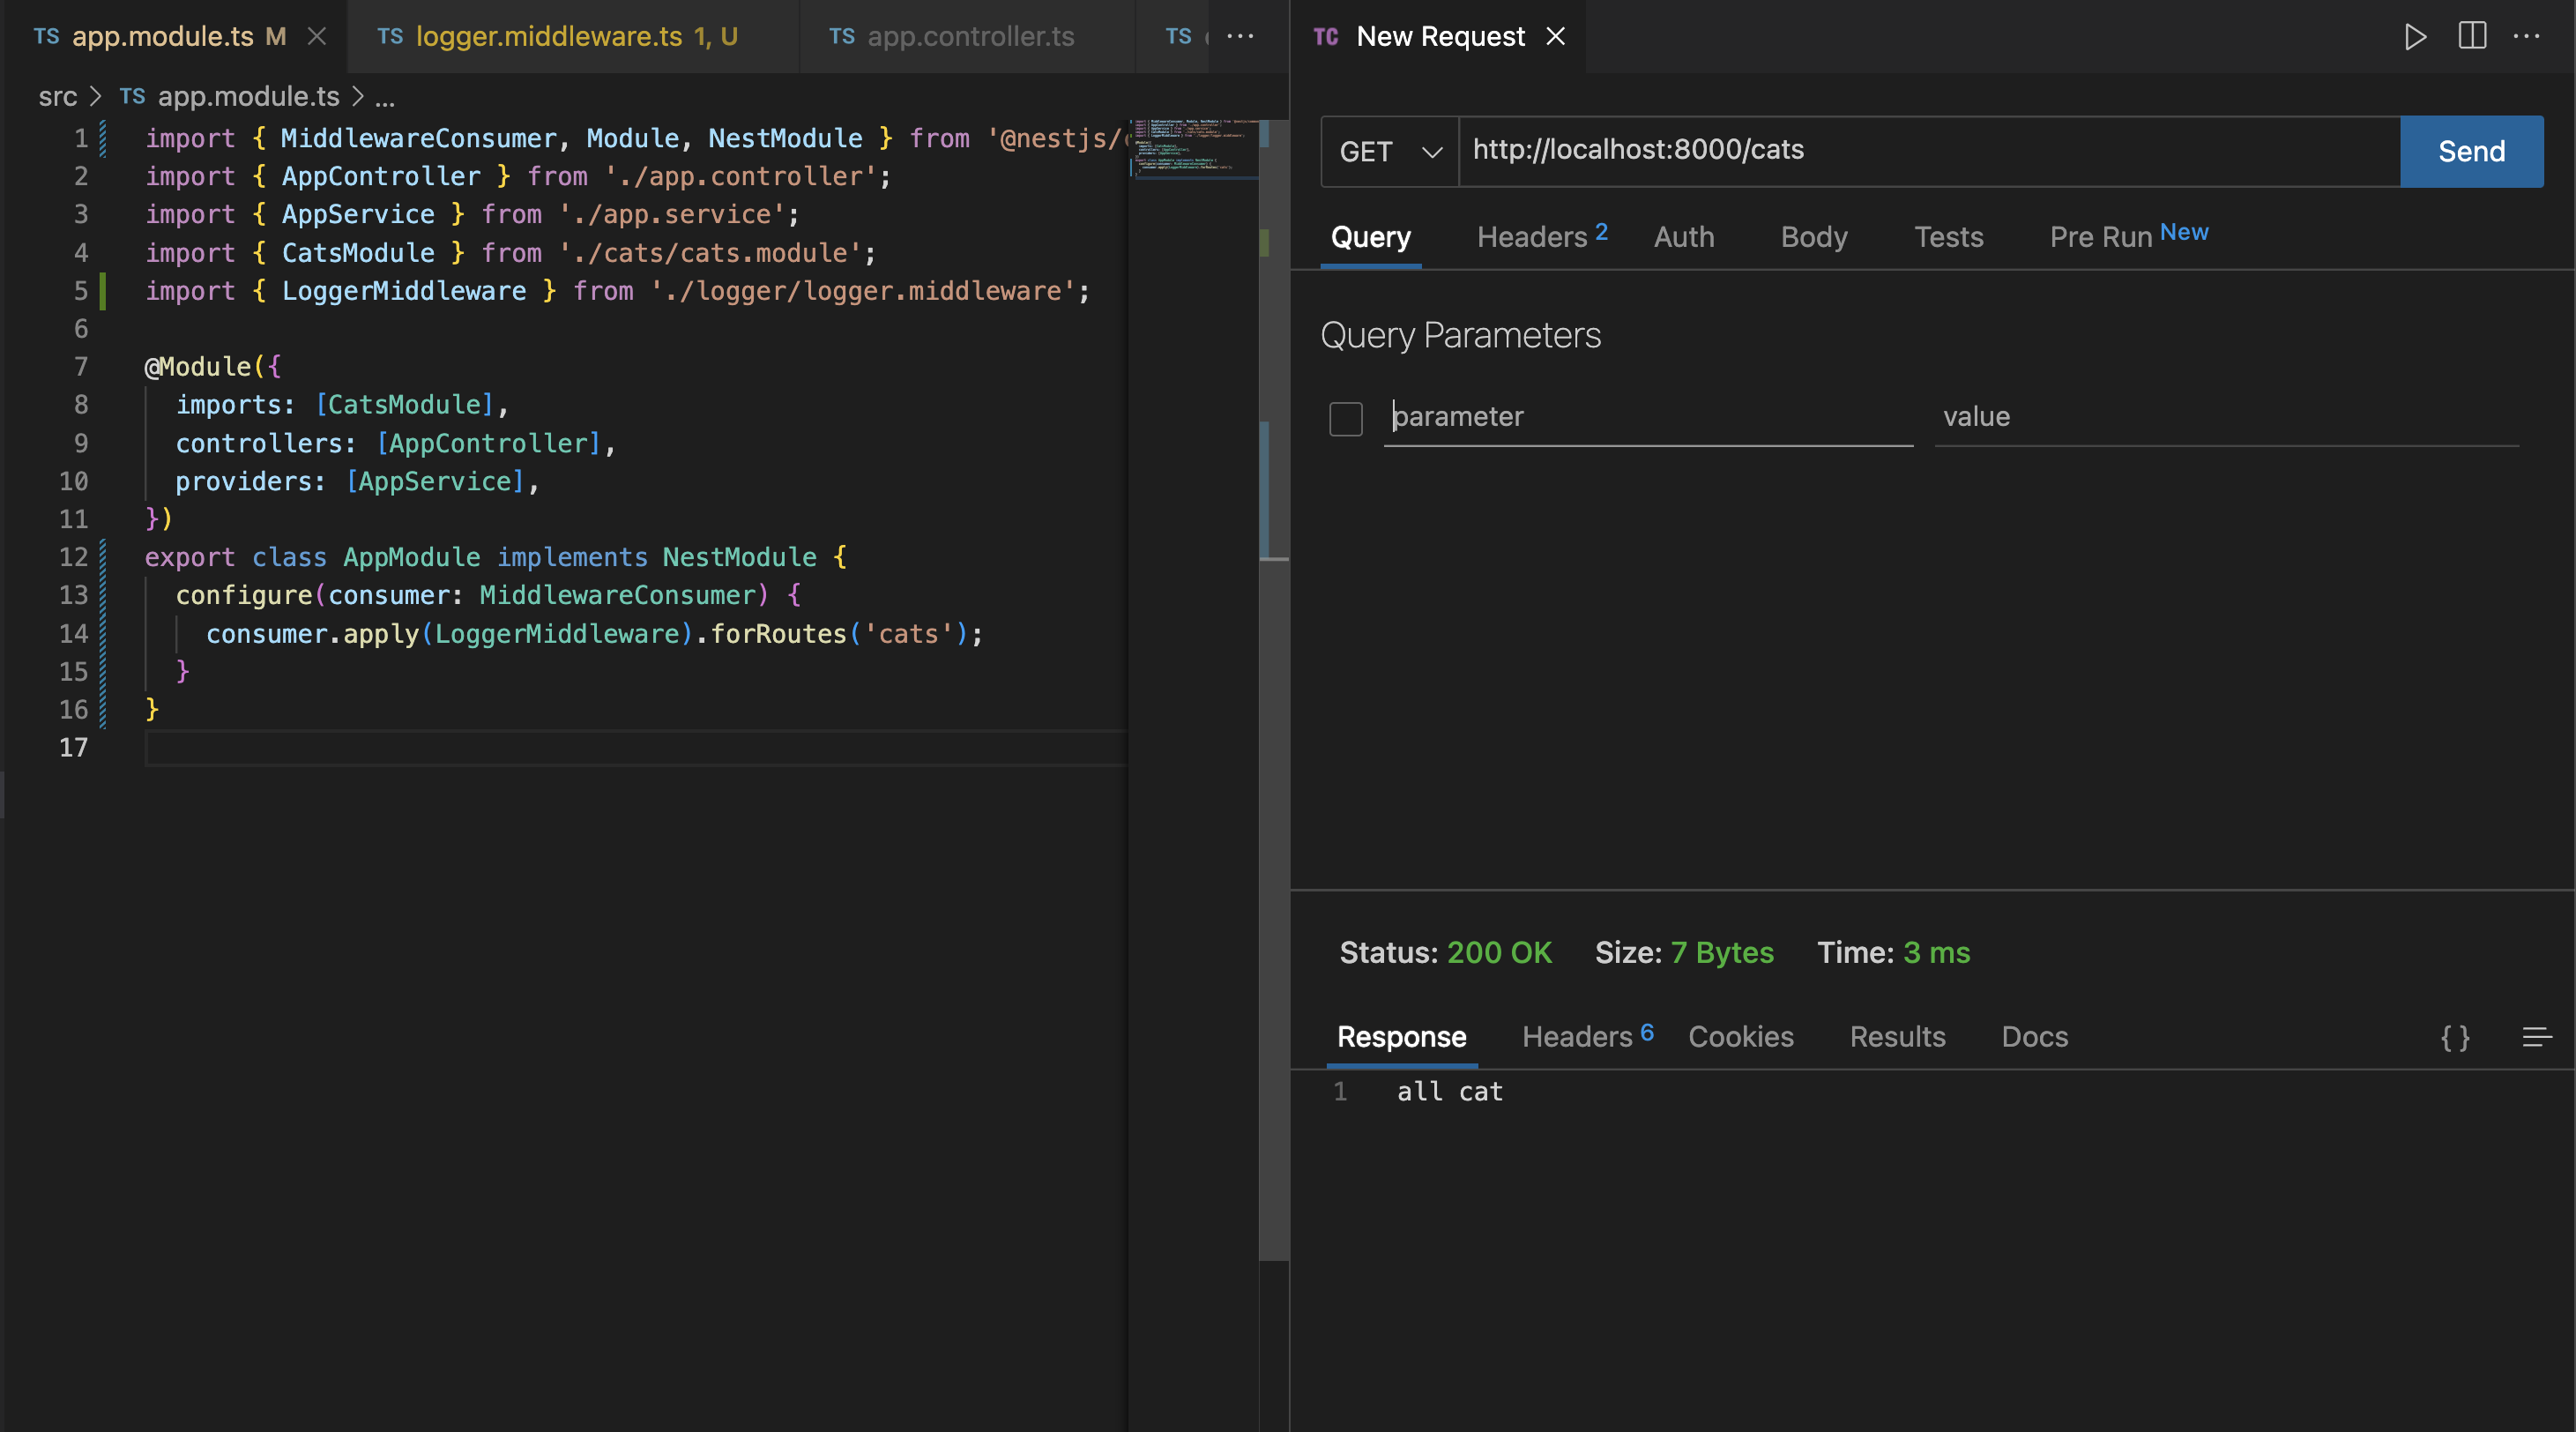
해당 URL과 method를 입력하면 컨트롤러에 작성했던 리턴값을 볼 수 있다.
그리고 로그창을 보면 미들웨어가 제대로 작동하는 것도 확인할 수 있다.

그러면 이 logger를 조금 더 Nest스럽게 바꿔보자.
import { Injectable, Logger, NestMiddleware } from '@nestjs/common';
import { Request, Response, NextFunction } from 'express';

@Injectable()
export class LoggerMiddleware implements NestMiddleware {
  private logger = new Logger('HTTP');
  use(req: Request, res: Response, next: NextFunction) {
    this.logger.log(req.originalUrl);
    next();
  }
}
console.log()를 사용하기보다 Nest에서 제공하는 Logger라는 기능을 사용하면 다음과 같은 로그를 얻을 수 있다.
현재 흐름은 미들웨어 -> 라우트 -> 리스폰스 이렇게 되어 있는데, 여기서 미들웨어가 response 이후에도 작동되게 할 수 있다.
import { Injectable, Logger, NestMiddleware } from '@nestjs/common';
import { Request, Response, NextFunction } from 'express';

@Injectable()
export class LoggerMiddleware implements NestMiddleware {
  private logger = new Logger('HTTP');
  use(req: Request, res: Response, next: NextFunction) {
    res.on('finish', () => {
      this.logger.log(`${req.originalUrl} ${res.statusCode}`);
    });
    next();
  }
}
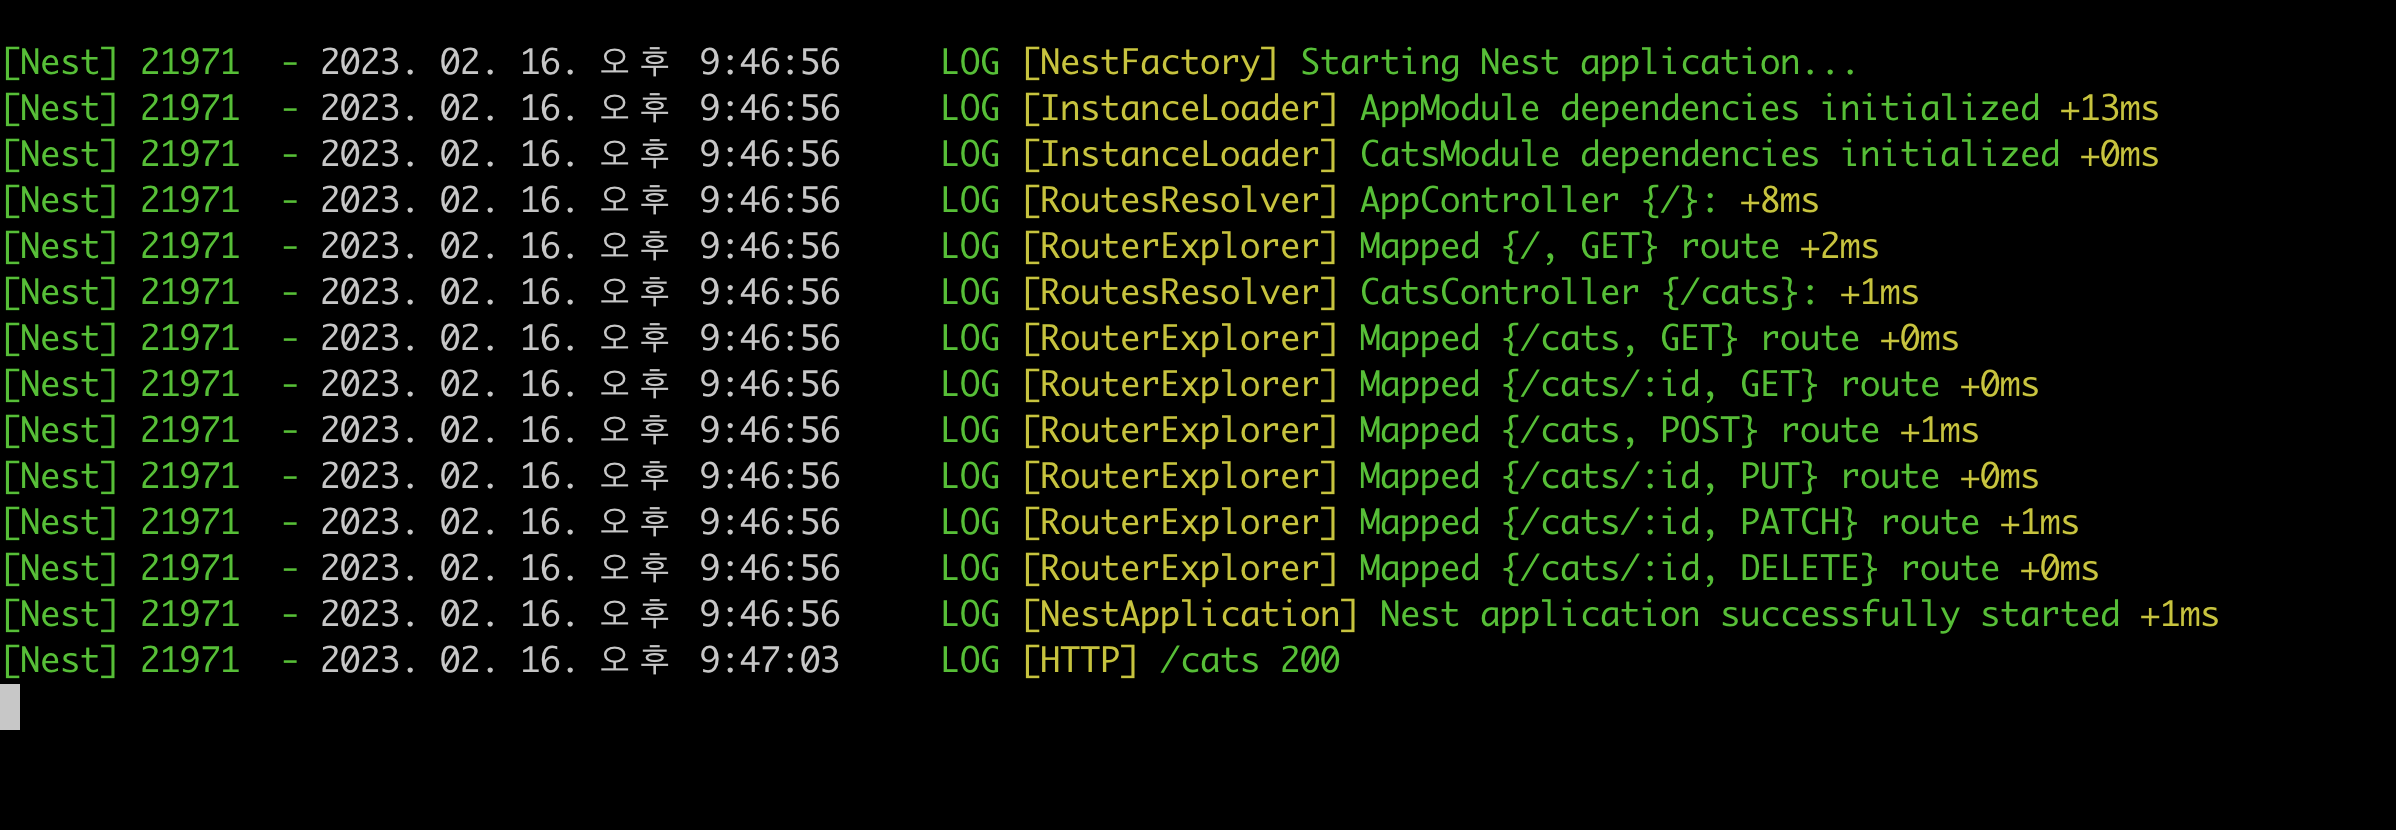
결과는 다음과 같다.
Multiple Middleware
여러 미들웨어를 바인딩하기 위해서는 apply() 메서드에 여러 미들웨어들을 인자로 넣으면 된다.
consumer.apply(cors(), helmet(), logger).forRoutes(CatsController);
Global Middleware
여태까지는 app.module.ts에서 app 모듈에 대한 미들웨어를 적용하고 있었다. 만약 미들웨어를 글로벌하게 적용하고 싶다면 main.ts에 등록하면 된다.
const app = await NestFactory.create(AppModule);
app.use(logger);
await app.listen(3000);
'개발자 도전기 > [STUDY] JS || TS' 카테고리의 다른 글
| NestJS | docs | Pipes (0) | 2023.02.23 |
|---|---|
| NestJS | docs | Exception filters (0) | 2023.02.17 |
| NestJS | docs | Modules (0) | 2023.02.16 |
| NestJS | docs | Provider (0) | 2023.02.13 |
| NestJS | docs | First steps, controllers (0) | 2023.02.11 |


댓글