※ 인프런 - 타입스크립트 시작하기(by 이재승) 강의를 기반으로 정리한 내용입니다.
todo를 추가했고, 이제는 todo를 삭제하는 기능을 구현해보자.
todo 삭제 클래스
command.ts 파일에 todo를 삭제하는 클래스를 작성한다.
// src/command.ts
// todo 제거하는 클래스
export class CommandDeleteTodo extends Command {
constructor() {
super("d", chalk`할 일 {red.bold 제거}하기`);
}
async run(state: Appstate): Promise<ActionDeleteTodo | undefined> {
// todos에 있는 모든 todo 출력
for (const todo of state.todos) {
const text = todo.toString();
console.log(text);
}
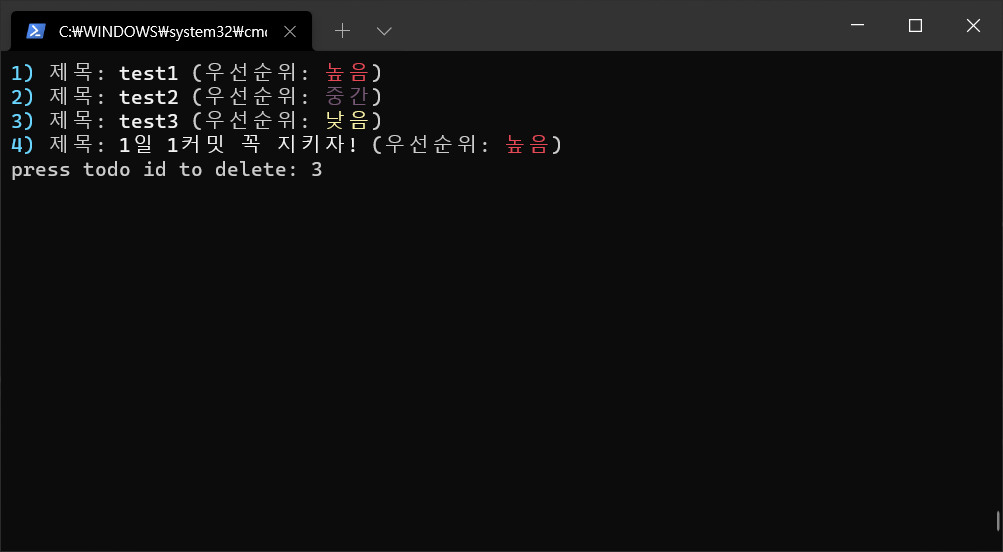
const idStr = await waitForInput("press todo id to delete: ");
const id = Number(idStr);
return {
type: "deleteTodo",
id,
};
}
}
이에 맞게 타입도 작성해준다. 이때 Action은 type이 통해 식별 가능한 유니온타입이기 때문에 Action 타입에 유니온 타입으로 ActionDeleteTodo도 추가한다.
// src/type.ts

export interface ActionDeleteTodo {
    type: "deleteTodo";    // 식별 가능한 유니온 타입(나중에 어떤 액션인지 구분하기 위한 용도)
    id: number;
}

export type Action = ActionNewTodo | ActionDeleteTodo;
이제 마지막으로 index.ts에 삭제클래스를 추가하여 삭제기능이 작동하도록 한다. 우선 클래스 인스턴스를 담는 배열인 commands에 CommandDeleteTodo() 클래스를 추가한다.
다음으로 getNextState()함수에 todo를 삭제하는 Action의 케이스를 추가한다. 액션 타입은 유니온 타입으로 정의되어 있기 때문에 해당 액션의 타입은 본인의 클래스에 맞는 타입으로 자동으로 좁혀진다. 이는 타입 가드에 의해 가능!!
import { Command, CommandDeleteTodo, CommandNewTodo, CommandPrintTodos } from "./Command";
import { waitForInput } from "./Input";
import Todo from "./Todo";
import { Action, Appstate, Priority } from "./type";
// 커맨드 클래스 통해 todo리스트 가져올 배열 생성, + todo추가 클래스 생성
const commands: Command[] = [
new CommandPrintTodos(),
new CommandNewTodo(),
new CommandDeleteTodo()
];
async function main() {
// 앱의 상태 정의
let state: Appstate = {
todos: [
new Todo("test1", Priority.High),
new Todo("test2", Priority.Medium),
new Todo("test3", Priority.Low),
],
}
while (true) {
// 처음 시작시 화면 클리어
console.clear();
// todo에 있는 목록 가져오기
for (const command of commands) {
console.log(command.toString());
}
console.log();
const key = await waitForInput("input command: "); // waitForInput이 프로미스 객체를 반환하기 때문에 async-await 사용
/**
* await는 프로미스 객체가 resolve나 reject가 될때까지 기다려줌
* resolve가 됐을 때 값을 가져옴
*/
console.clear();
// 입력한 값이 커맨드에 있다면
const command = commands.find(v => v.key === key);
if (command) {
// 액션
const action = await command.run(state);
if (action) {
state = getNextState(state, action);
}
}
}
}
main();
// 현재 상태와 Action을 입력으로 받아서 다음 상태를 반환해주는 함수
const getNextState = (state: Appstate, action: Action): Appstate => {
// 액션 타입을 유니온 타입으로 정의했기 때문에 해당 액션의 타입이 좁혀짐(타입 가드)
switch(action.type) {
case "newTodo":
return {
...state,
todos: [...state.todos, new Todo(action.title, action.priority)] // 기존 todos에 새로운 todo 추가
};
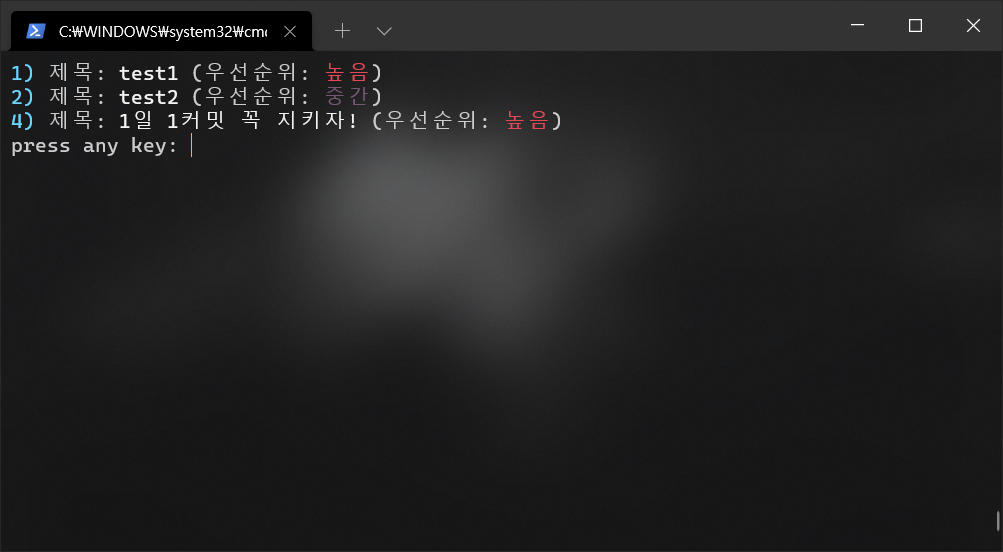
case "deleteTodo":
return {
...state,
todos: state.todos.filter(item => item.id !== action.id)
};
}
}
chalk 적용
각 파일별로 최종 상태는 다음과 같다.
index.ts
import chalk from "chalk";
import { Command, CommandDeleteTodo, CommandNewTodo, CommandPrintTodos } from "./Command";
import { waitForInput } from "./Input";
import Todo from "./Todo";
import { Action, Appstate, Priority } from "./type";

// 커맨드 클래스 통해 todo리스트 가져올 배열 생성, + todo추가 클래스 생성
const commands: Command[] = [
    new CommandPrintTodos(),
    new CommandNewTodo(),
    new CommandDeleteTodo()
];

async function main() {
    // 앱의 상태 정의
    let state: Appstate = {
        todos: [
            new Todo("test1", Priority.High),
            new Todo("test2", Priority.Medium),
            new Todo("test3", Priority.Low),
        ],
    }

    while (true) {
        // 처음 시작시 화면 클리어
        console.clear();

        // chalk 사용법 예시
        // Tagged Template Literals(ES6에 추가된 기능)
        // console.log(chalk`aaa bbb ccc`);
        // console.log(chalk`aaa {bold bbb} ccc`);
        // console.log(chalk`aaa {yellow bbb} ccc`);
        // console.log(chalk`aaa {yellow.bold bbb} ccc`);

        // todo에 있는 목록 가져오기
        for (const command of commands) {
            console.log(command.toString());
        }
        console.log();

        const key = await waitForInput("input command: ");  // waitForInput이 프로미스 객체를 반환하기 때문에 async-await 사용
        /**
         * await는 프로미스 객체가 resolve나 reject가 될때까지 기다려줌
         * resolve가 됐을 때 값을 가져옴
         */
        console.clear();

        // 입력한 값이 커맨드에 있다면
        const command = commands.find(v => v.key === key);
        if (command) {
            // 액션
            const action = await command.run(state);
            if (action) {
                 state = getNextState(state, action);
            }
        }
    }
}

main();


// 현재 상태와 Action을 입력으로 받아서 다음 상태를 반환해주는 함수
const getNextState = (state: Appstate, action: Action): Appstate => {
    // 액션 타입을 유니온 타입으로 정의했기 때문에 해당 액션의 타입이 좁혀짐(타입 가드)
    switch(action.type) {
        case "newTodo":
            return {
                ...state,
                todos: [...state.todos, new Todo(action.title, action.priority)]    // 기존 todos에 새로운 todo 추가
            };
        case "deleteTodo":
            return {
                ...state,
                todos: state.todos.filter(item => item.id !== action.id)
            };
    }
}
Command.ts
import chalk from "chalk";
import { waitForInput } from "./Input";
import { Action, ActionDeleteTodo, ActionNewTodo, Appstate, Priority, PRIORITY_NAME_MAP } from "./type";
import { getIsValidEnumValue } from "./util";
export abstract class Command { // 추상클래스 Command
constructor(
public key: string, // key: 키보드로 입력한 값
private desc: string
) {}
// 화면에 해당 커맨드가 하는 일이 뭔지 설명해주기 위한 메소드
toString() {
return chalk`{blue.bold ${this.key}}: ${this.desc}`;
}
// 실행함수. 당장 구체화시키지 않을 것이기 때문에 abstract로 생성
abstract run(state: Appstate): Promise<void | Action>;
}
// 모든 todo 프린트하는 클래스
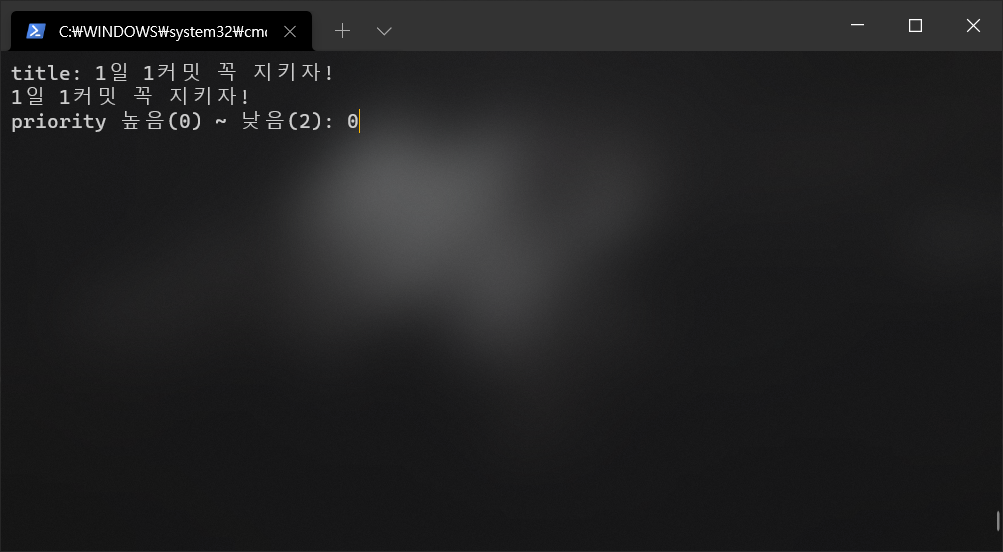
export class CommandPrintTodos extends Command {
constructor() {
super("p", chalk`모든 할 일 {red.bold 출력}하기`);
}
async run(state: Appstate): Promise<void> {
for (const todo of state.todos) {
const text = todo.toString(); // 모든 todo 출력
console.log(text);
}
await waitForInput("press any key: ");
}
}
// 새로운 todo 추가하는 클래스
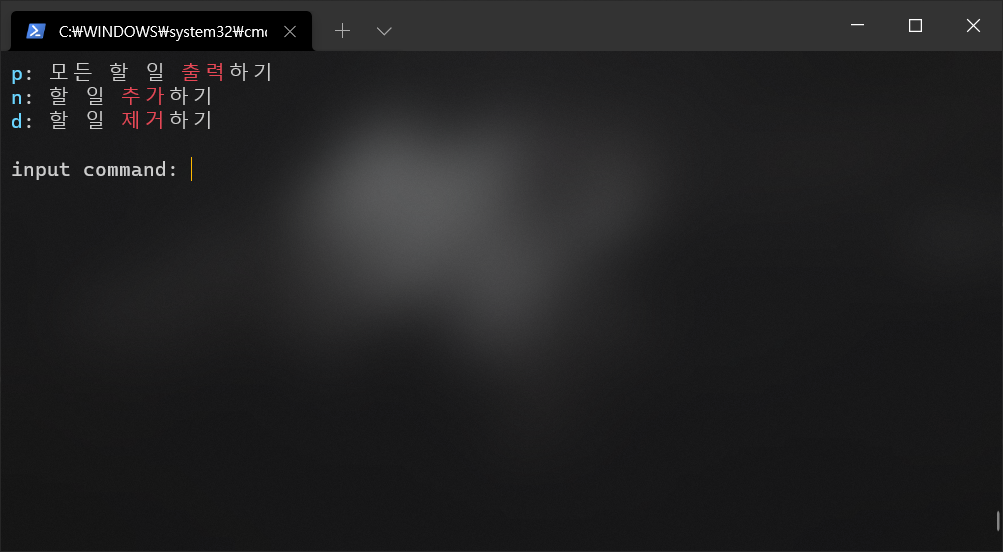
export class CommandNewTodo extends Command {
constructor() {
super("n", chalk`할 일 {red.bold 추가}하기`);
}
async run(): Promise<void | ActionNewTodo> { // ActionNewTodo 타입도 설정
const title = await waitForInput("title: ");
// priority 높음(0) ~ 낮음(2) 이런식으로 사용자에게 더 친절한 설명 위해 map 생성(type.ts에서 변수 생성)
const priorityStr = await waitForInput(`priority ${PRIORITY_NAME_MAP[Priority.High]}(${Priority.High}) ~ ${PRIORITY_NAME_MAP[Priority.Low]}(${Priority.Low}): `);
const priority = Number(priorityStr);
// 제목(빈 문자열 X)과 우선순위(enum에 속하는지) validation 체크
if (title && CommandNewTodo.getIsPriority(priority)) {
// todo 추가
// 이 작업은 앱의 상태를 변경하는 것이기 때문에 index.ts에서 다루는 것이 더 적합. 어떻게 바꿔야 하는지만 설명 --> Action
return {
type: "newTodo",
title,
priority
}
}
}
// 우선순위 enum에 맞는지 여부 파악하는 함수
static getIsPriority(priority: number): priority is Priority {
return getIsValidEnumValue(Priority, priority);
}
}
// todo 제거하는 클래스
export class CommandDeleteTodo extends Command {
constructor() {
super("d", chalk`할 일 {red.bold 제거}하기`);
}
async run(state: Appstate): Promise<ActionDeleteTodo | undefined> {
// todos에 있는 모든 todo 출력
for (const todo of state.todos) {
const text = todo.toString();
console.log(text);
}
const idStr = await waitForInput("press todo id to delete: ");
const id = Number(idStr);
return {
type: "deleteTodo",
id,
};
}
}
type.ts
import Todo from "./Todo";

export enum Priority {
    High,
    Medium,
    Low
}

export interface Appstate {
    todos: Todo[];  // Todo 클래스의 배열
}

// priority 높음(0) ~ 낮음(2) 이런식으로 사용자에게 더 친절한 설명 위해 map 생성
export const PRIORITY_NAME_MAP: { [key in Priority]: string } = {   // 맵드타입 이용하여 enum의 속성 누락 없도록
    [Priority.High]: "높음",
    [Priority.Medium]: "중간",
    [Priority.Low]: "낮음",
}

// 액션
export interface ActionNewTodo {
    type: "newTodo";    // 식별 가능한 유니온 타입(나중에 어떤 액션인지 구분하기 위한 용도)
    title: string;
    priority: Priority;
}

export interface ActionDeleteTodo {
    type: "deleteTodo";    // 식별 가능한 유니온 타입(나중에 어떤 액션인지 구분하기 위한 용도)
    id: number;
}

export type Action = ActionNewTodo | ActionDeleteTodo;
Todo.ts
import chalk from "chalk";
import { Priority, PRIORITY_NAME_MAP } from "./type";

// Todo 클래스
export default class Todo {
    static nextId: number = 1;  // 객체별로 이 변수를 관리할 필요가 없기 때문에 static으로 정의
    constructor(
        private title: string,
        private priority: Priority,
        public id: number = Todo.nextId,
    ) {
        Todo.nextId++;
    }
    toString() {
        return chalk`{blue.bold ${this.id})} 제목: {bold ${this.title}} (우선순위: {${PRIORITY_STYLE_MAP[this.priority]} ${PRIORITY_NAME_MAP[this.priority]}})`;   // 우선순위 한글로 나오게 수정
    }
}

// 우선순위에 따라 색 매핑
const PRIORITY_STYLE_MAP: { [key in Priority]: string} = {
    [Priority.High]: "red.bold",
    [Priority.Medium]: "grey.bold",
    [Priority.Low]: "yellow.bold",
}
그런데 코드들을 보다보면, chalk라는 생소한 키워드가 보인다. 이는 커맨드라인에서 출력되는 텍스트에 폰트 스타일을 적용하기 위해서 사용되는 함수로 ES6부터 추가된 기능이다. 아래와 같은 코드를 쳤을 때 보이는 예시는 다음과 같다.
        console.log(chalk`aaa bbb ccc`);
        console.log(chalk`aaa {bold bbb} ccc`);
        console.log(chalk`aaa {yellow bbb} ccc`);
        console.log(chalk`aaa {yellow.bold bbb} ccc`);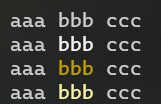
그래서 최종적으로 작동하는 todo앱은 다음과 같다.
여기까지가 강의의 끝이다. 타입스크립트에 대해 알차게 공부를 했지만, 역시 내 것으로 체화시키기 위해서는 더 많은 노력이 필요할 것 같다. 한 번 더 복습해보고 다음 프로젝트 강의를 들으면서 타입스크립트에 더 익숙해지도록 하자!!!
'개발자 도전기 > [STUDY] JS || TS' 카테고리의 다른 글
| ts-node | NodeBird | express 미들웨어 (0) | 2022.04.19 |
|---|---|
| ts-node | NodeBird | 초기 세팅 (0) | 2022.04.18 |
| TypeScript | 강의 메모 | CLI에서 동작하는 todo앱 프로젝트 - Todo 추가, 삭제하기(1) (0) | 2022.04.14 |
| TypeScript | 강의 메모 | CLI에서 동작하는 todo앱 프로젝트 (0) | 2022.04.13 |
| TypeScript | 강의 메모 | 타입 추론, 타입가드 (0) | 2022.04.05 |


댓글